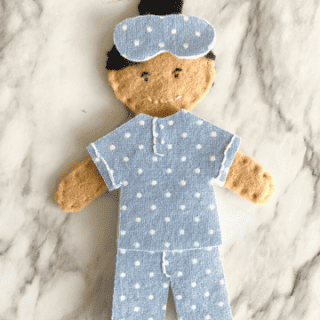
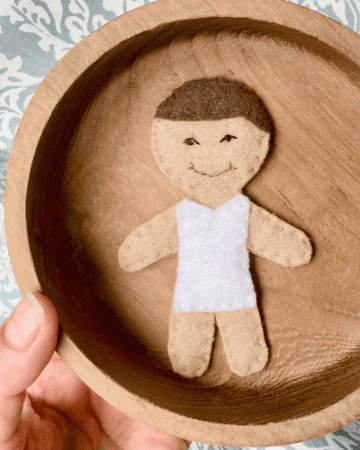
Try your hand at this adorable felt doll pajama pattern that coordinates with my felt doll pattern and tutorial.

I love coming up with new outfits and costumes for the felt dolls I made for my children. Pajamas seemed like and obvious choice, and when I found a scrap of red checkered “flannel” in my fabric stash that was the natural choice.
Or course multiple dolls means multiple pairs of PJ’s. After all, what if they want to have a sleepover?
Here is what I came up with that day for felt doll pajamas. I hope you enjoy making them as much as I did, and allow your creativity to flow!
Felt Doll Pajamas Tutorial
Supplies:
- 3×6 scrap of fabric (flannel or cotton)
- 3×6 piece of coordinating felt
- embroidery floss
- fuzing web (Wonder Under or Heat n Bond)
- iron
- ironing board
- sharp scissors
- embroidery or craft needle
- Downloadable PDF felt doll pajama pattern
Find my complete lists of felt crafting supplies HERE!
Directions:
1) Preparing the Fabric
Begin by selecting which fabric you would like to be used for the felt doll pajamas, and cut a 3×6 inch rectangle of this fabric.
Cut a 3×6 inch rectangle from a piece of fusing web just slightly smaller than you fabric piece. You don’t want extra fusing web to overhang the fabric and attach to your ironing board.
Use your iron to fuse the web to the back of the fabric. To do this, make sure the right side of the fabric is facing down on your ironing board. Next, set the fusing web, paper side up, on top the fabric. Run a hot iron over the pieces according to the directions on the package. Once the two are fused together, allow to cool.
2) Prepare the Pattern Pieces
Meanwhile, cut out the pattern pieces from your printed PDF pattern.
Once the fabric has cooled, trace the pattern pieces onto the paper backing of the fusing web. Since this pattern is symmetrical, it should not matter which way you lay the pieces. There is not a “front” or “back”, “left” or “right”.
Use sharp scissors to cut out the pajama pieces. Remove the paper backing.
3) Embroider the Details
Thread your craft needle with 2-3 feet of three strands of embroidery floss in your desired color.
Using a backstitch, sew the details shown on the pattern as dashed lines.
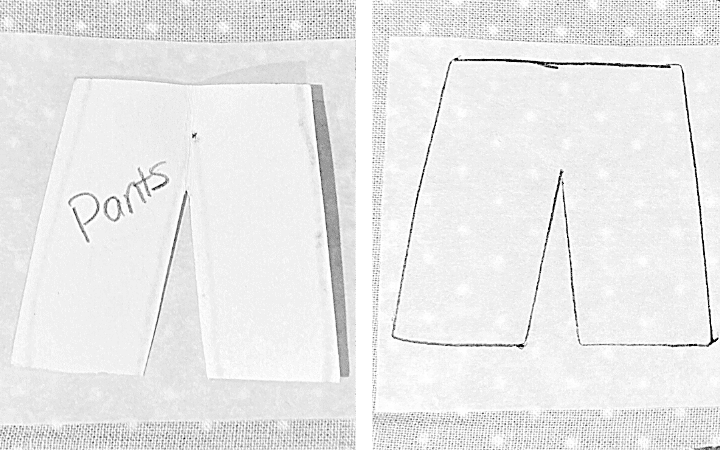
Begin by inserting your needle one stitch length from the edge of the fabric, pushing the needle up from the backside/underside of the fabric. Pull the floss through until about 1/3 of an inch of tail remains on the back of your workpiece. Finish the first “backstitch” by wrapping the floss around the edge of the fabric, and back up through the same hole. Now your detailing will continue all the way through to the edge of the pajamas once you are finished. (See the illustration below.)

Continue backstitching until you have finished the detail. Leave 1/3 inch of tails on the backside of the fabric when you are finished. Since this piece will be fused to felt later in step five it is not necessary to tie of ends since everything will get “melted” together, but you can certainly do so if you’d like.
Continue the process above for the remaining sleeve, fly, and button down details on the shirt and pants.

4) Add the Buttons
Use a french knot, or a series of small stitches/knots to make the buttons on the shirt.
5) Add the Felt Backing
Once you have finished all the details on the patterned fabric, it is time to “cover your mechanics” (AKA strings) and add the felt backing which will add thickness to the clothing and allow it to rest well on the felt doll.
Cut a 3×6 inch piece of felt in a coordinating color to your pajama pieces.
Place the felt on your ironing board, and then set your fused and embroidered pajama pieces with the fusing side down on top of the felt.
Before ironing, but sure all the strings are tucked under and everything is lined up how you like. Place your iron on top of the pieces and iron according to package directions until the top and bottom felt pieces are fused. Allow to cool.

6) The Final Cuts
Use your sharp scissors to cut around the pieces that have been fused to the felt. Be sure to not cut too close to your “backstitches” that fold over the ends of your fabric, or you could cut the embroidery floss loop loose.
Get the Felt Doll Pajama Pattern Here!
Enjoy this outfit with these other felt doll patterns
Get Your Felt Doll Pajamas Supplies Here
Fat Quarter Bundle – Assorted Fabrics
Find all my felt crafting supplies with links HERE.
*As an Amazon Associate or member of other affiliate programs I earn from qualifying purchases.
Felt Doll Pajama's
Adorable pajamas that coordinate with my Knoll 22 felt dolls patterns.
Materials
- 3x6 scrap of fabric (flannel or cotton)
- 3x6 piece of coordinating felt
- embroidery floss
- fuzing web (Wonder Under or Heat n Bond)
- iron
- ironing board
- sharp scissors
- embroidery or craft needle
- Downloadable PDF felt doll pajama pattern
Instructions
1) Preparing the Fabric
Begin by selecting which fabric you would like to be used for the felt doll pajamas, and cut a 3x6 inch rectangle of this fabric.
Cut a 3x6 inch rectangle from a piece of fusing web.
Use your iron to fuse the web to the back of the fabric. To do this, make sure the right side of the fabric is facing down on your ironing board. Next, set the fusing web, paper side up, on top the fabric. Run a hot iron over the pieces according to the directions on the package. Once the two are fused together, allow to cool.
2) Prepare the Pattern Pieces
Meanwhile, cut out the pattern pieces from your printed PDF pattern.
Once the fabric has cooled, trace the pattern pieces onto the paper backing of the fusing web. Since this pattern is symmetrical, it should not matter which way you lay the pieces. There is not a "front" or "back", "left" or "right".
Use sharp scissors to cut out the pajama pieces. Remove the paper backing.
3) Embroider the Details
Thread your craft needle with 2-3 feet of three strands of embroidery floss in your desired color.
Using a backstitch, sew the details shown on the pattern as dashed lines.
Begin by inserting your needle one stitch length from the edge of the fabric, pushing the needle up from the backside/underside of the fabric. Pull the floss through until about 1/3 of an inch of tail remains on the back of your workpiece. Finish the first "backstitch" by wrapping the floss around the edge of the fabric, and back up through the same hole. Now your detailing will continue all the way through to the edge of the pajamas once you are finished.
Starting the embroidery detail with the first "backstitch".
Continue backstitching until you have finished the detail. Leave 1/3 inch of tails on the backside of the fabric when you are finished. Since this piece will be fused to felt later in step five it is not necessary to tie of ends since everything will get "melted" together, but you can certainly do so if you'd like.
Continue the process above for the remaining sleeve, fly, and button down details on the shirt and pants.
4) Add the Buttons
Use a french knot, or a series of small stitches/knots to make the buttons on the shirt.
5) Add the Felt Backing
Once you have finished all the details on the patterned fabric, it is time to "cover your mechanics" (AKA strings) and add the felt backing which will add thickness to the clothing and allow it to rest well on the felt doll.
Cut a 3x6 inch piece of felt in a coordinating color to your pajama pieces.
Place the felt on your ironing board, and then set your fused and embroidered pajama pieces with the fusing side down on top of the felt.
Before ironing, but sure all the strings are tucked under and everything is lined up how you like. Place your iron on top of the pieces and iron according to package directions until the top and bottom felt pieces are fused. Allow to cool.
6) The Final Cuts
Use your sharp scissors to cut around the pieces that have been fused to the felt. Be sure to not cut too close to your "backstitches" that fold over the ends of your fabric or you could cut the embroidery floss loop loose.
‚© Amber Widman 2023
www.knoll22.com/felt-doll-pajamas

Leave a Reply