
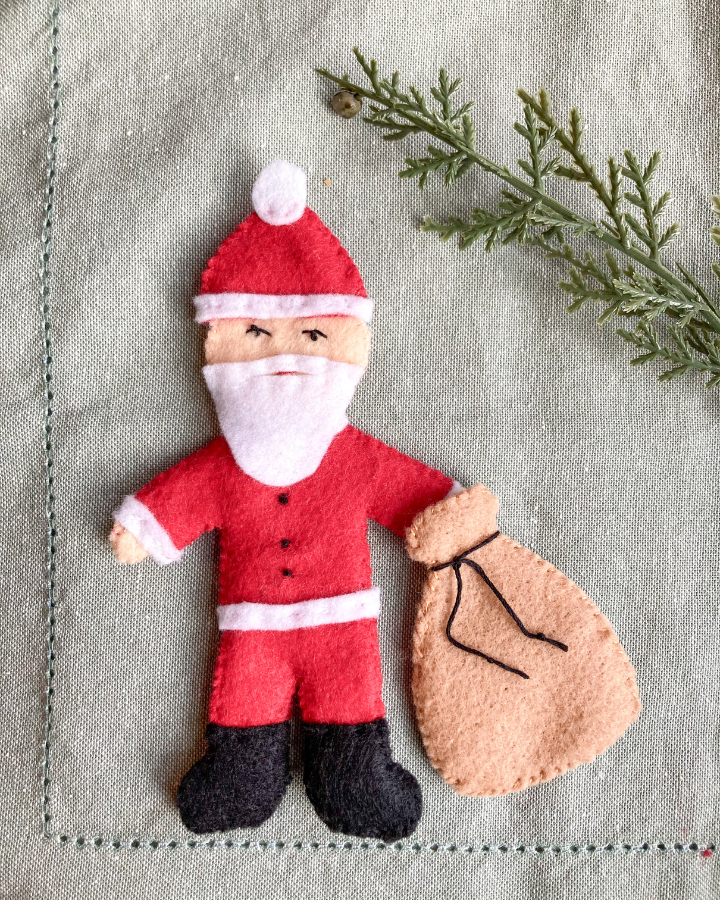
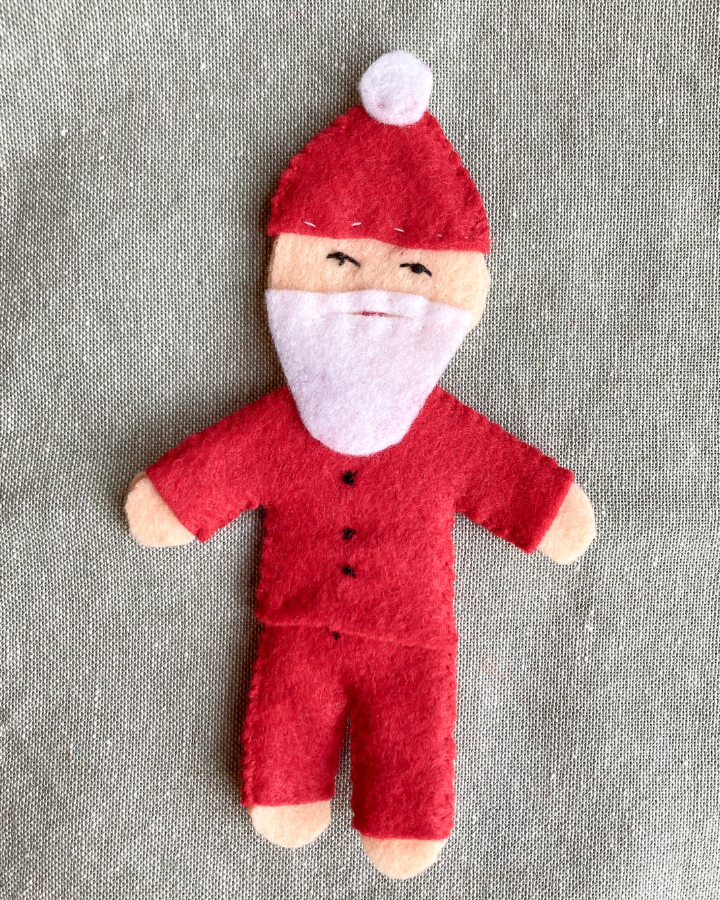
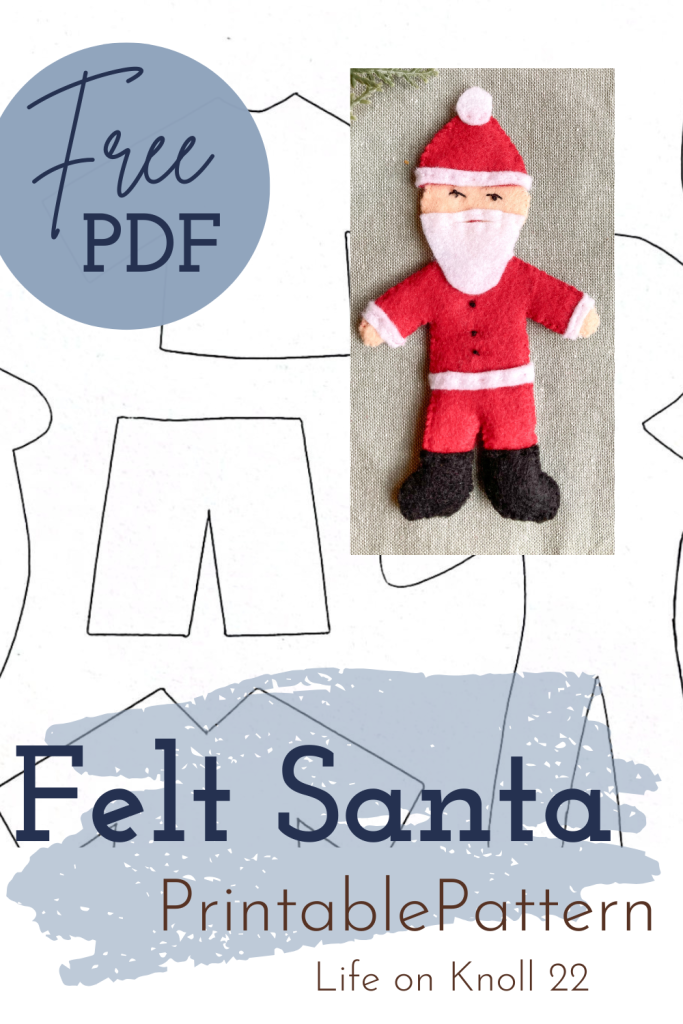
Felt Doll Santa is here to spread some holiday cheer for the good little boys and girls on your Christmas list. This jolly old elf is handmade and a simple sewing project for a snowy afternoon.
Supplies
- Red, white, black, and brown Felt
- Assorted coordinating colors of embroidery floss
- Needle
- Sharp scissors
- Two 6mm x 2mm rare earth magnets (TRY THESE)
- Santa Felt Doll PDF Pattern (Download Here)
Felt Doll Santa Tutorial
STEP ONE: Cut out the Pattern Pieces
Begin by downloading the SANTA FELT DOLL PDF PATTERN. Print the pattern at 100% (whole page), then cut out each of the paper pieces and their matching felt piece(s).
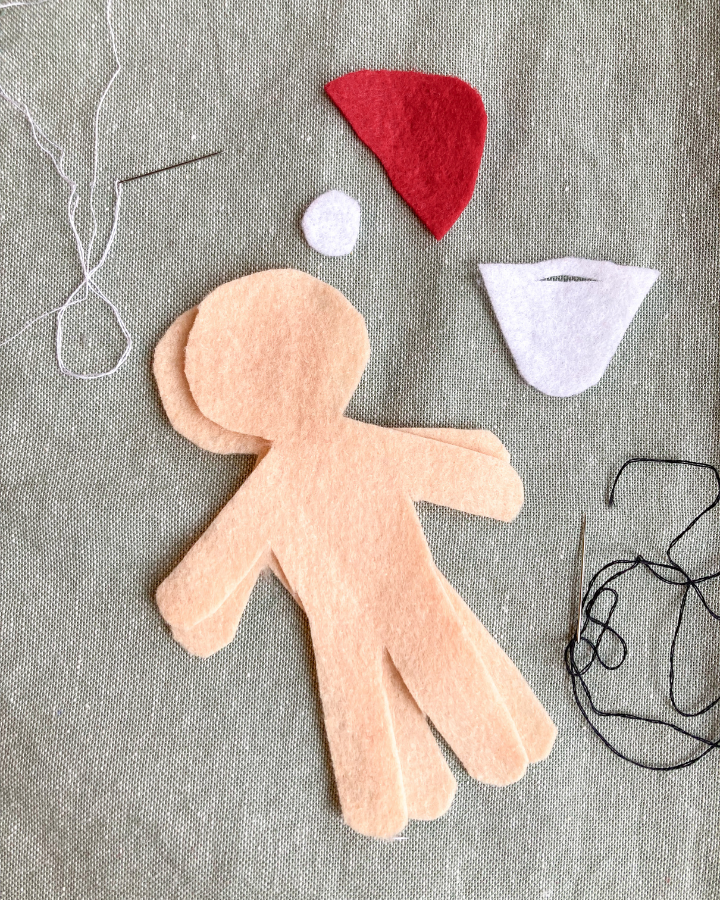
STEP TWO: Attach Beard and Santa Hat. Add Eyes.
Begin by using white floss or thread to attach the white pompom to the tip of the hat (shown) and the beard to the face (shown).
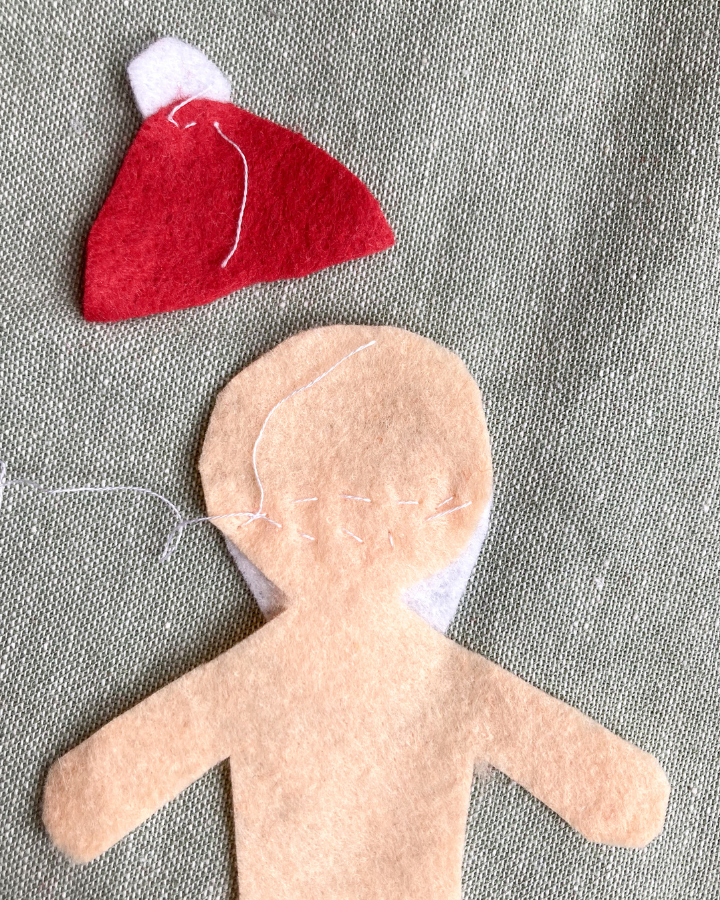
Next, attach the hat to the head. Sew along the bottom edge of the hat to attach (shown below). Don’t worry about your sticking, the thread will be covered later with the white fuzzy trim. The edges will be secured in a later step.

Finally, add the face using black embroidery floss. First make two stitches in a slight upside down “V” or mountain shape. Place a french knot in the center just below where the two stitched meet. Repeat for each eye. (Shown above)
STEP THREE: Attach clothing.
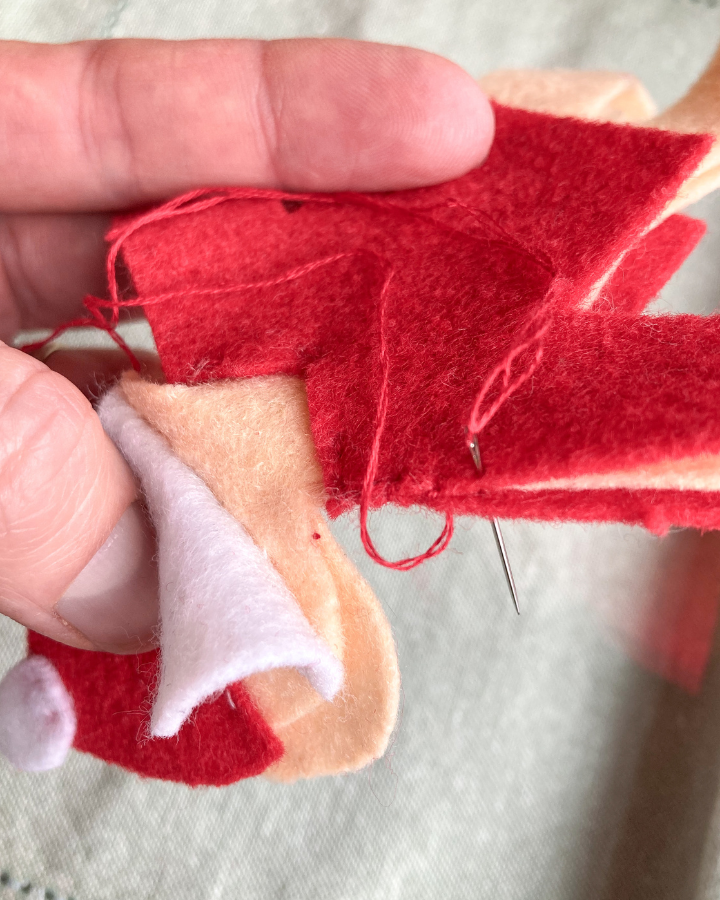
For the clothing you will need 2 shirts and two pants. Begin by threading your needle with red string or floss. Line up the two body panels on top of each other with the “wrong sides” (this with threads and knots) together. Then sandwich the body pieces with the shirt pieces. One shirt behind, two body panels, and one piece in front. The clothing pieces will be larger than the arms and body. This is how you want it.
Next, using a whip stitch, begin sewing along the edges of the two shirt pieces (shown below). Start at the neck and work down the arm. The whip stitches will enclose the clothing around the body so there will not be any flesh colored felt showing. Once you reach the hand jump over to the other edge of the sleeve.
As you approach the bottom of the first side of the shirt, line up the pants in the same “sandwich” way. One pant on top, body panels in the middle, one pant on top. The waistline of the pants should tuck slightly under the bottom “hem” of the shirt. So the final few stitches at the bottom of the shirt will also include the top of the pants. No belly shirts here!
After you have the sewn down the leg of the pant, jump over the foot like you did with the hand, and continue around the legs, up the side, around the arms, and to the neck.
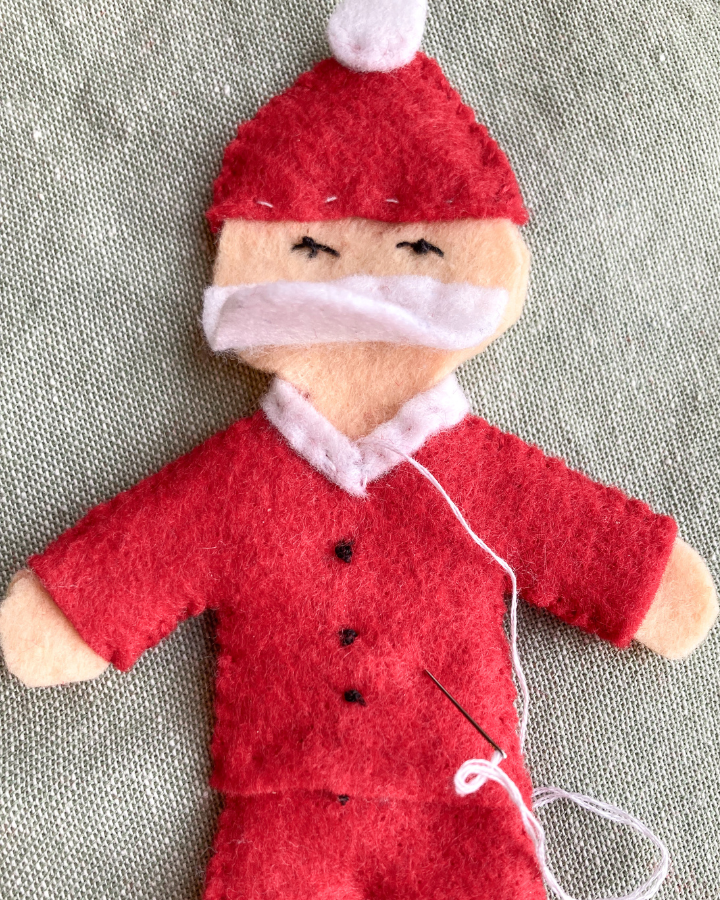
Attach the hat in the same way. Line up the hat pieces and use a whip stitch around the top of the head. At this point your Santa should look like the one shown above (minus the buttons)
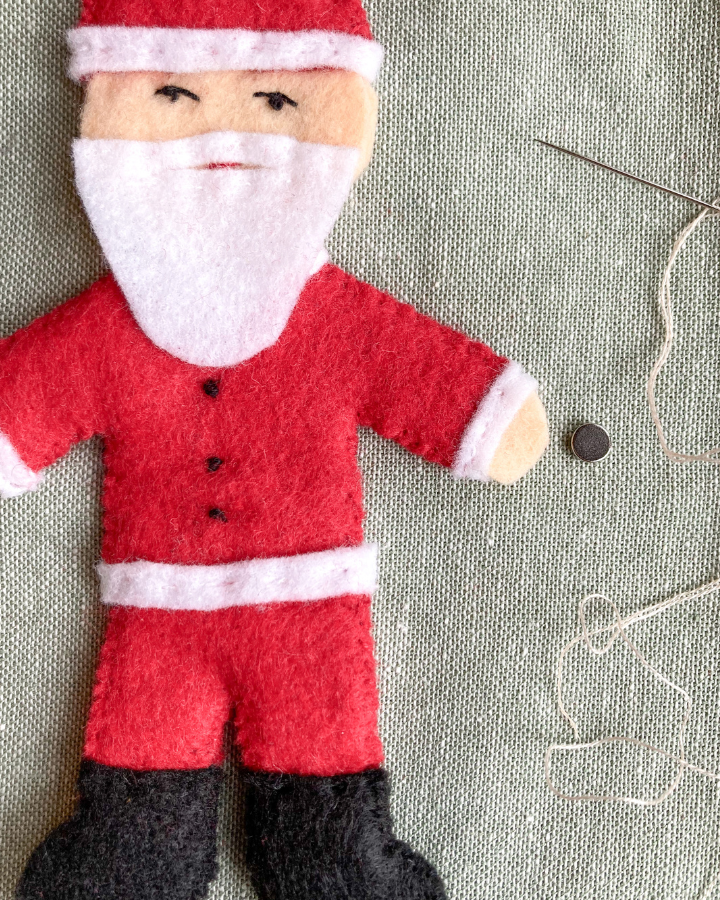
STEP FOUR: Add Buttons
Use black embroidery floss to add three french knots down the front of Santa’s shirt. Only poke your needle through the top layer of shirt and body panel so there won’t be any black thread showing out the back.
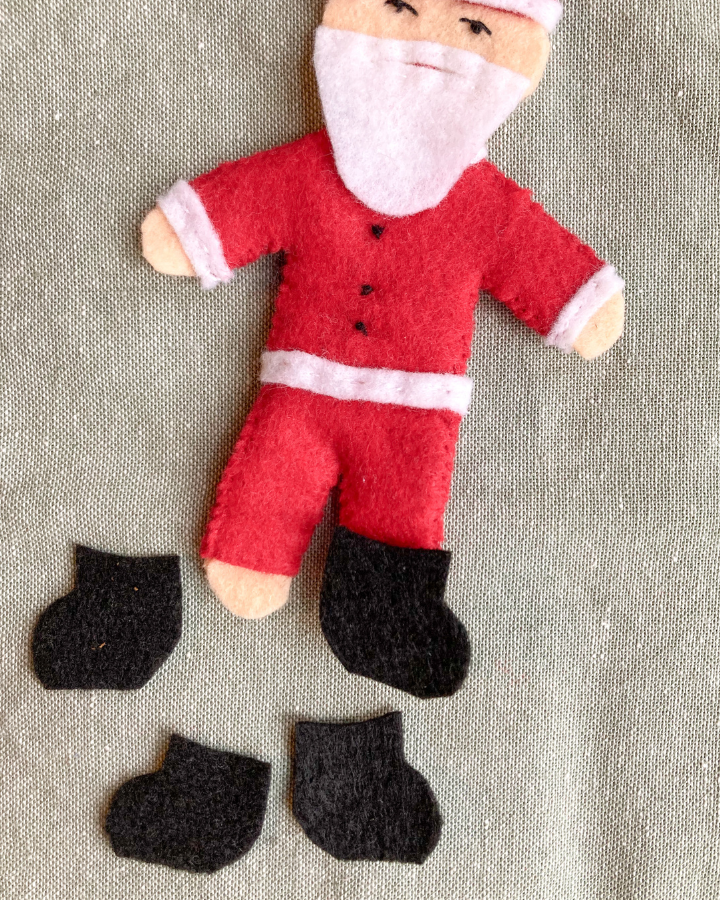
STEP FIVE: Add the White Trim
Now that the clothing is attached, it’s time to add the white trim.
Thread your needle with white thread or floss. Use a running stitch to attach the collar (shown below).
The wrist cuffs and hem of the shirt will need to be cut from a thin strip of white felt. Rather than making a pattern for this, it was easier to just have you make a piece that fits yourself. Cut two narrow rectangles long enough to wrap around the wrists, and one long enough to wrap around the waist like a belt. Use a running stitch to attach the cuffs and hem.
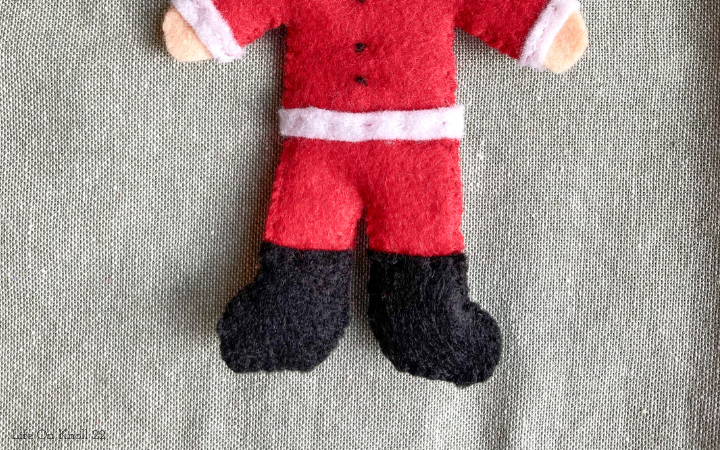
STEP SIX : Add the Boots
Next you will add the boots. Place two boot pieces over the doll’s feet. Use black floss or string to sew a whip stitch around the exterior of the boot. The boot pieces are wide enough to go over the top of the red pants, enclosing the red felt completely.
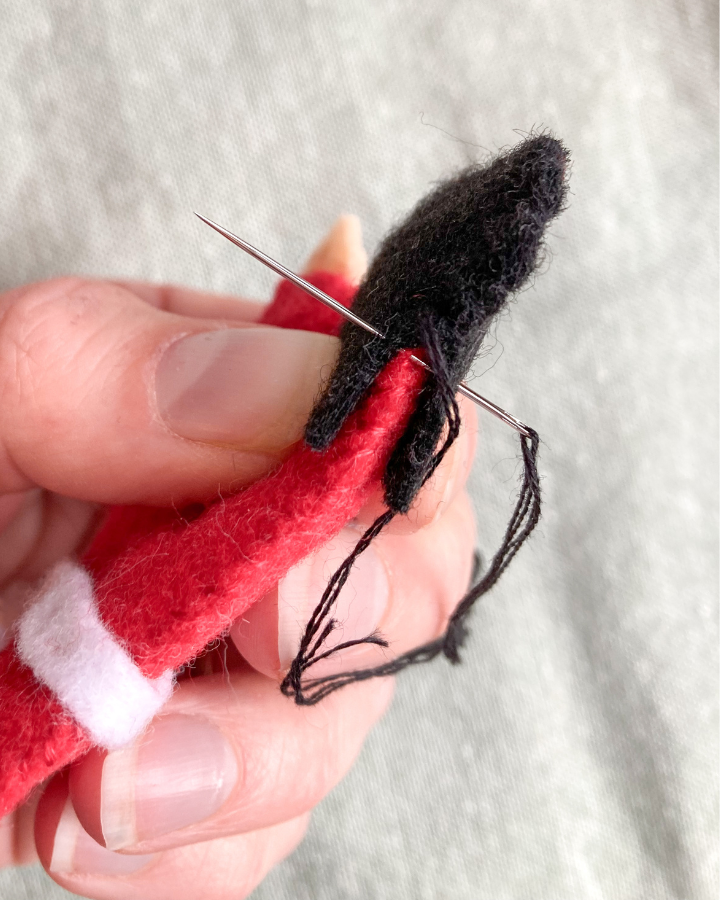
Finish across the top of the boots with a running stitch that pokes through all layers to secure everything in place.
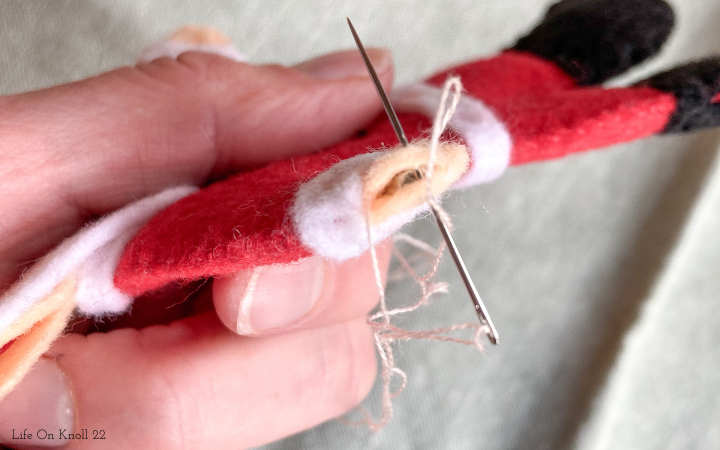
STEP SEVEN: Make Santa Magnetic
A couple years ago I started adding mini magnets to my felt dolls to make them more versatile for accessories and creative play. You can find more information on how to construct a MAGNETIC FELT DOLLS in that post if you need it.
Be sure to check the polarity of your magnets and accessories before sewing the doll shut. If one doll has the magnet’s positive side forward in its hands and another has negative forward hands your accessories won’t be compatible. They’ll stick to the front of one doll’s hand and the back of another.
To begin, place one magnet into the hand of the felt doll Santa between the two layers of the body panel. Since you likely went through all the layers of felt when adding the coat cuff, the magnet should not slide down into the arm or body of the doll. If you didn’t do this, you can simply add a couple stitches to create a seam that prevents too much movement of the magnet. You want it to stay in the hand area.
Use flesh colored floss to begin stitching the hand shut near one cuff, and whip stitch around the hand until you reach the other cuff (shown below). Repeat with the other hand.
STEP EIGHT: Finish the head
Once you finish the hand’s use the remaining flesh colored floss to work your way along both sides of the head and neck. Be sure to only stitch through the flesh colored body panels and leave Sant’s beard “free”. Only the top of the beard by the mouth is attached to the doll. (How else would you see his handsome collar?)
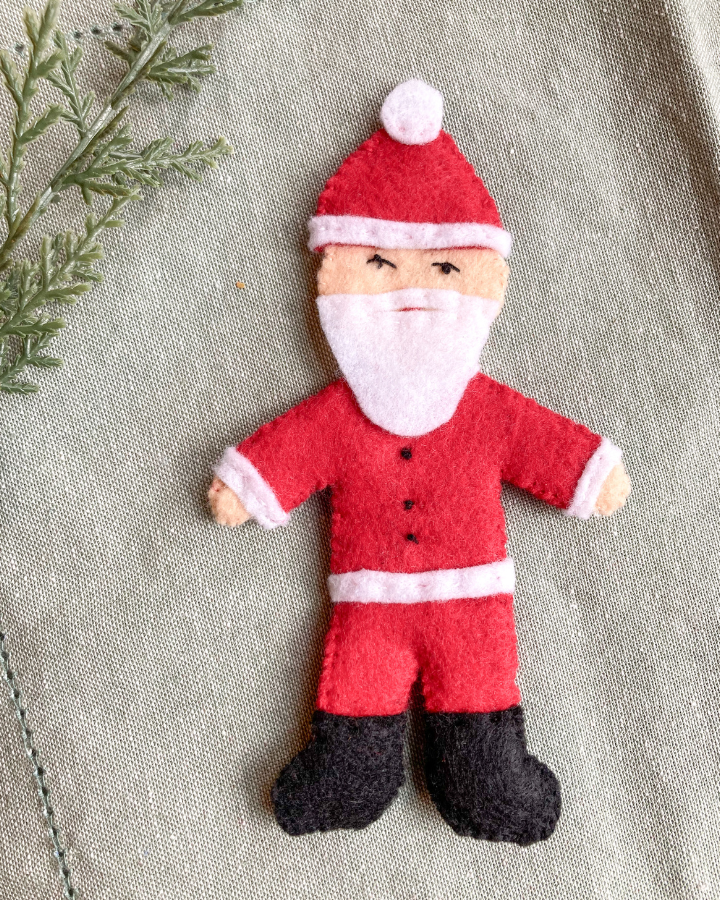
That’s it! You made the felt doll Santa! Don’t forget to make him a Magnetic Santa Sack to carry all those gifts.
DOWNLOAD THE FELT DOLL SANTA PDF PRINTABLE
Don’t forget Santa’s Sack!

Save this one to your Handmade Christmas Pinterest Board!
Leave a Reply