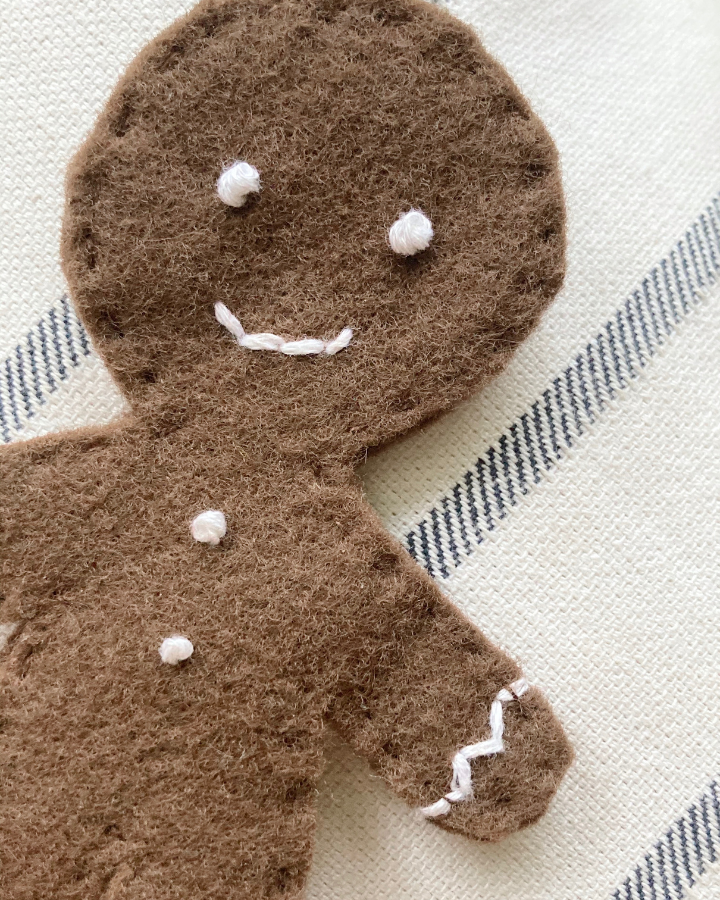
Felt gingerbread man pattern and tutorial. Perfect for holiday gifting, decor, and play.

Felt Gingerbread Man Tutorial
Supplies:
- Dark brown felt
- White embroidery floss
- Dark brown embroidery floss
- Needle
- Sharp scissors
- PDF Felt Gingerbread Man Pattern
Directions:
Print off the PDF Felt Gingerbread Man pattern available for download at the end of this post.
Cut Out the Felt Pieces
Cut out two of the gingerbread body panels from brown felt.
Prepare Your Needle
Thread your needle with 2 strands of white embroidery floss (approx. 3 feet long). Line up both cut ends of the floss strands and tie an overhand knot to bind all four strand ends together. You will now have a needle that cannot slide off the floss, and a total of four strands of thickness when you pull through your fabric.
Stitch the Gingerbread Frosting Details
To begin, select one of the body panels to be the front of you gingerbread man. Stitch the gingerbread “frosting” details shown as dotted lines on the pattern. The frosting details include the zig-zag lines and mouth. You can choose to follow what I have done or make your own design.
Be sure to start and tie off all you strings on the back side of the panel so all your ends will be hidden in the final product.
I like to use a backstitch for the details on my felt patterns. To get the stitching to reach all the way to the edge of your felt gingerbread man, start by wrapping the first stitch around the end of the felt as shown in the illustration below. (Please note, if you are going to be using a backstitch, you’ll actually want the needle to come up where you want the second stitch to start, not in the same hole as the digram shows.).
Finally, wrap your final stitch in a similar manner to complete the look on both ends. Tie off as needed.
First Stitch Illustration

Tie the Gingerbread Eyes and Buttons
Once you finish the frosting details, proceed to the eyes and buttons. Be sure to tie off your strings as needed. However, since the back panel will cover your mechanics, you may choose to jump from detail to detail without tying off and cutting the string in between.
Use french knots to add eyes and buttons to your gingerbread man.
Add the Back Body Panel
After all the embroidery detailing on the front body panel is complete, it is time to attach the back body panel. This second gingerbread piece helps provide structure, but most importantly it covers any knots and strings. Covering the mechanics gives us a nicely finished felt gingerbread man.
First, begin by lining up the two body panels with the “right sides” facing out. Use a single strand of brown embroidery floss to stitch around the entire perimeter of the gingerbread man. Finally, tie off as discreetly as possible and trim any excess string.
There you have it! Your very own felt gingerbread man. Don’t forget to make him a friend 🙂
Additional Project Ideas!
Consider using this felt gingerbread man pattern to make one of these creative projects!
Garland
Make a series of felt gingerbread men and turning them into a garland to hang across your mantel.
Ornaments
Attach a length of string, or a hook, to the top of the felt gingerbread man to make ornaments for your tree.
Gift Tags
Embroider each gift recipients name on the front of a felt gingerbread man and attach to their gift instead of a paper tag.
“Unpaper Dolls” Play Kit
Create several felt gingerbread people along with some accessories for a cute play kit. Perfect for a quiet bag, road trips, or a Christmas gift to a little one in your life.
Get more inspiration using the felt dolls pattern and the coordinating clothes patterns.
Find All The Supplies
*As an Amazon Associate or member of other affiliate programs I earn from qualifying purchases.
Felt Gingerbread Man Pattern
Felt Gingerbread Man PDF Pattern
*for personal or classroom use only.
PRINTING INSTRUCTIONS
Once you download the PDF pattern, be sure to print it with settings set to “fill the whole page”. The download is 8.5 x11 inches with margins for printing already built into the download. Print the image at 100%. The bar at the bottom of the pattern is for scale. When printed properly it should be one inch long. Printing to scale assures congruency among patterns. So the doll, clothing, and accessories all fit together properly.
Not Christmas Season Yet?
That’s ok! Add the pattern to your holiday Pintrest board.


Felt Gingerbread Man
Materials
- Dark brown felt
- White embroidery floss
- Dark brown embroidery floss
- PDF Felt Gingerbread Man Pattern
Tools
- needle
- sharp scissors
Instructions
- Cut out two of the gingerbread body panels from brown felt.
- Thread your needle with 2 strands of white embroidery floss (approx. 3 feet long). Line up both cut ends of the floss strands and tie an overhand knot to bind all four strand ends together. You will now have a needle that cannot slide off the floss, and a total of four strands of thickness when you pull through your fabric.
- To begin, select one of the body panels to be the front of you gingerbread man. Stitch the gingerbread "frosting" details shown as dotted lines on the pattern. The frosting details include the zig-zag lines and mouth. You can choose to follow what I have done or make your own design.
- Be sure to start and tie off all you strings on the back side of the panel so all your ends will be hidden in the final product.
- I like to use a backstitch for the details on my felt patterns.
- Finally, wrap your final stitch in a similar manner to complete the look on both ends. Tie off as needed.
- Once you finish the frosting details, proceed to the eyes and buttons. Be sure to tie off your strings as needed. However, since the back panel will cover your mechanics, you may choose to jump from detail to detail without tying off and cutting the string in between.
- Use french knots to add eyes and buttons to your gingerbread man.
- After all the embroidery detailing on the front body panel is complete, it is time to attach the back body panel. This second gingerbread piece helps provide structure, but most importantly it covers any knots and strings. Covering the mechanics gives us a nicely finished felt gingerbread man.
- First, begin by lining up the two body panels with the "right sides" facing out. Use a single strand of brown embroidery floss to stitch around the entire perimeter of the gingerbread man. Finally, tie off as discreetly as possible and trim any excess string.

Leave a Reply