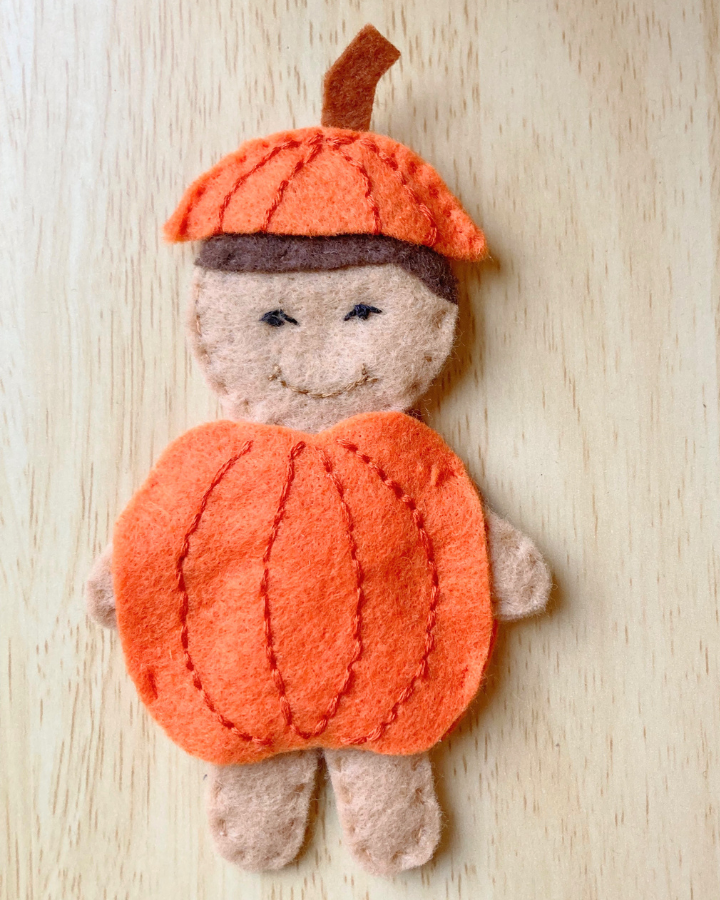
A simple pumpkin costume pattern to dress your favorite felt doll in festive fall style. This felt pumpkin pattern is an easy costume idea!

Supplies
- orange felt
- brown felt
- orange embroidery floss
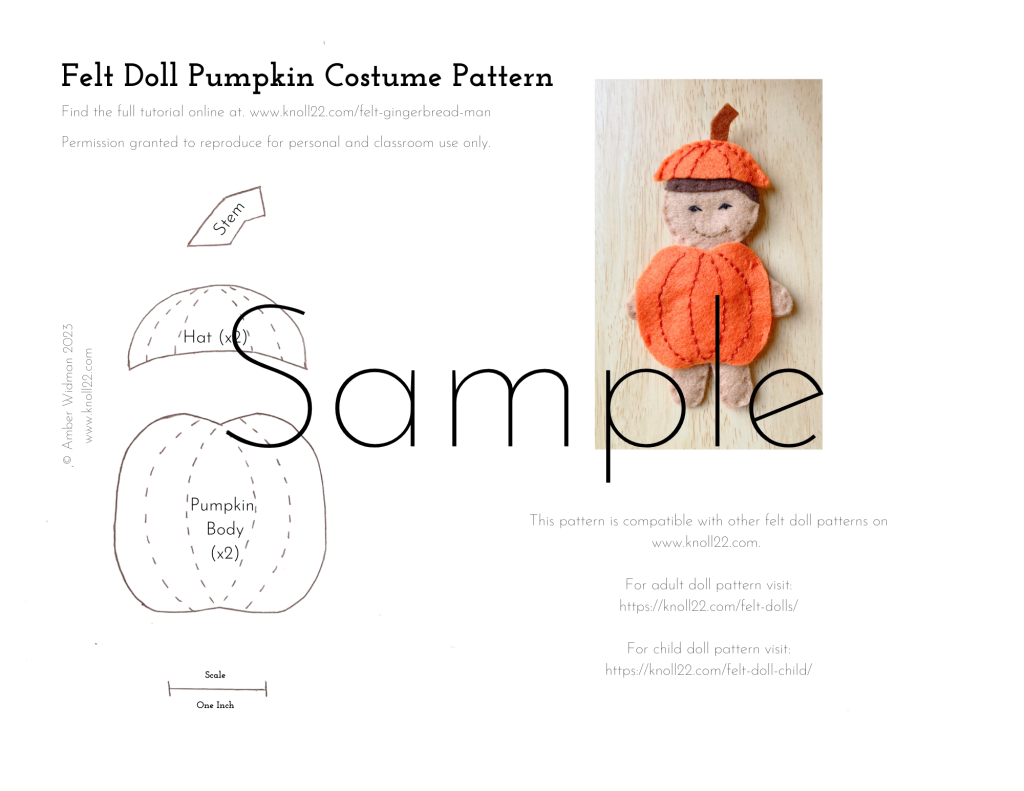
- Pumpkin Costume PDF Pattern Download
Download the Pattern Here
Cut the Felt Pieces
Begin by cutting out the paper pattern pieces on the PDF download.
Next, use the paper patterns to cut two pumpkin bodies and two hat pieces from the orange felt. Cut the stem from brown felt.
Add the Embroidery Detail
Using a total of a four strand thickness or orange embroidery floss, sew the detail onto the pattern pieces as indicated by a dashed line on the pattern. Add the detailing on one of the pumpkin body pieces and one hat piece. I used a backstitch.
Be sure all the strings are secure and well tied so the doll does not get caught in them wehn you put the costume on.
Construct the Pumpkin Body
Stack the embroidered pumpkin body piece onto the second pumpkin body piece. Attach firmly with several stitches at the four points indicated by stars on the diagram below. You may choose to only use the top to points of attachment and hang the pumpkin costume over the shoulders of the doll. This would would make the costume easiest for children to take on and off.
Whichever way you choose to attach the two pieces together, be sure to do it as securely as possible. There isn’t much stitching so those are points of weakness, and my first attempts didn’t hold.

Use orange floss to attach the pumpkin body pieces at the points indicated by the stars
Putting the Pumpkin Costume On
To get the doll into the pumpkin body, begin by tucking the legs through the neck opening.
Then fold the arms of the doll across its chest like a hug.
Slide the pumpkin body the rest of the way up to the neck.
Finally, unfold the arms and poke them out their respective holes.

Constructing the Hat
Stack the embroidered hat piece on top of the second hat piece. Place the base of the brown felt stem between the layers at the top of the hat.
Using a single strand of orange floss, begin stitching at one point of the hat and stitch across the entire top arch to the other point. Be sure the base of the stem is in far enough that you catch the fabric when you are stitching.
Leave the bottom of the hat open so it can go over the head of the doll.
Tie off and trim any strings. The hat is complete!!
I really hope you enjoy this pumpkin costume pattern as much as I enjoyed making it.


Leave a Reply