
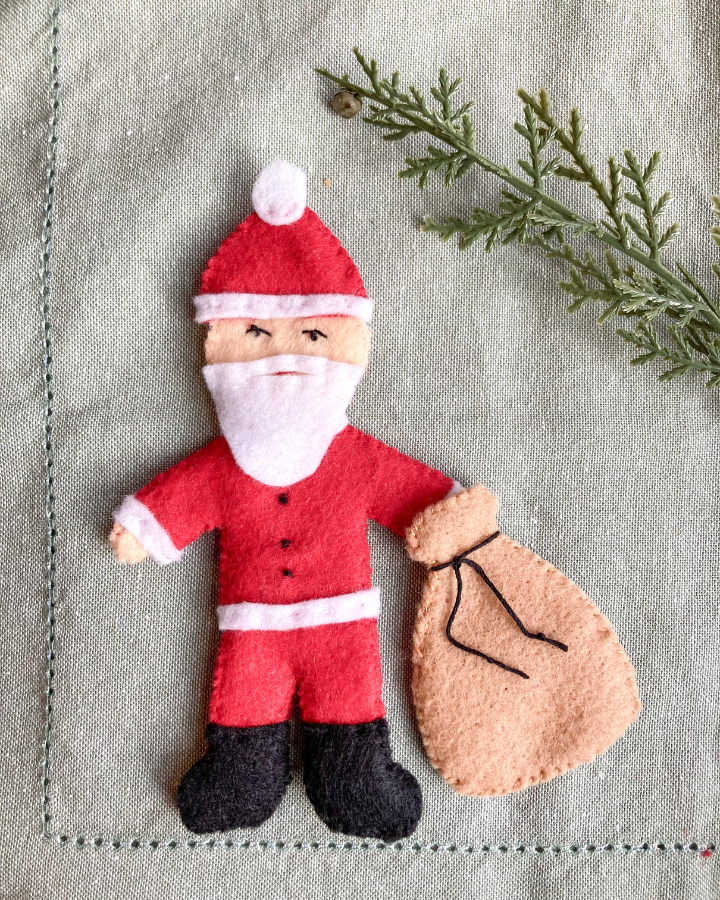
This felt Santa sack is the prefect accessory for the magnetic felt doll Santa and my other magnetic felt doll patterns.
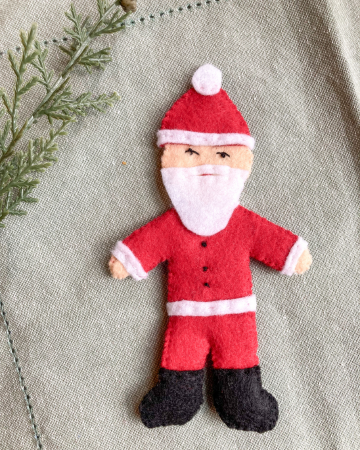
I created this pattern as a companion to my original Felt Doll Santa. This magnetic gift sack attaches to Santa’s hand so he doesn’t loose it going down the chimney. It also has a pocket in the back to place other felt doll accessories and gifts.
Felt Doll Santa Sack
Supplies:
- tan felt
- tan and black embroidery floss
- 6mm x 2mm rare earth magnet
- Printable Felt Doll Santa PDF Pattern (Download HERE)
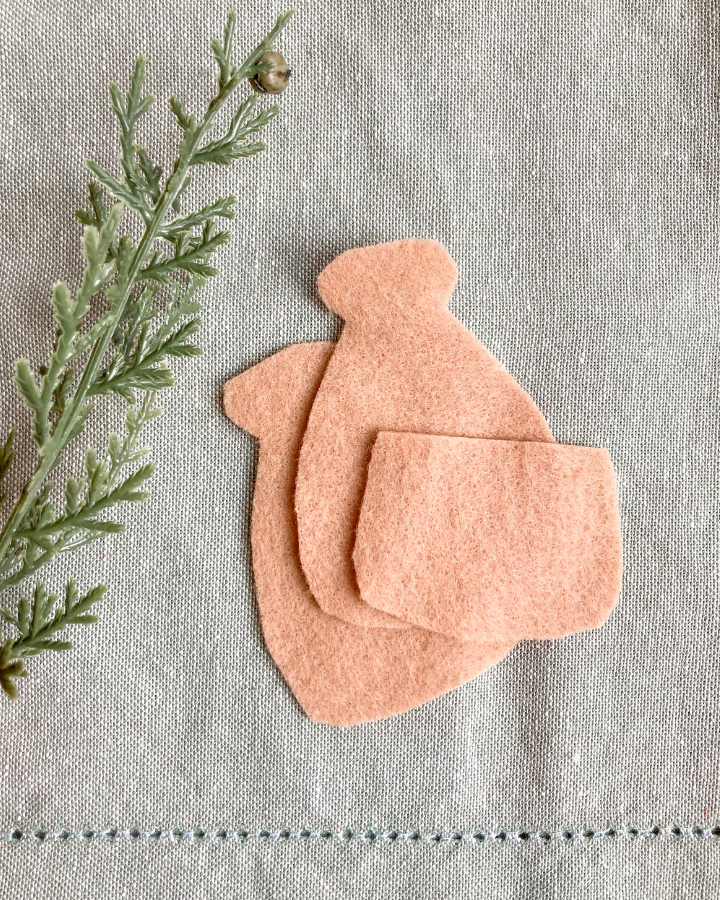
STEP ONE: Cut out the pieces
Begin by downloading and printing off the FELT DOLL SANTA PDF PATTERN. This download includes the pattern pieces for both the Santa sack and the FELT DOLL SANTA.
Cut out the paper pieces for the sack. Use the paper pattern pieces to cut the felt pieces for the Santa sack (shown below).
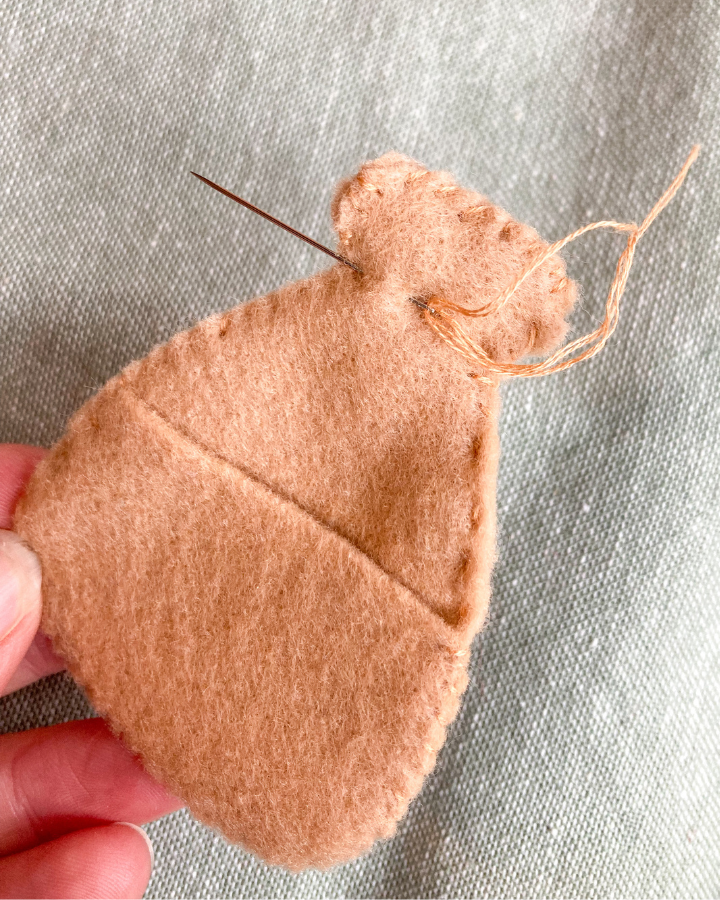
STEP TWO: Sew the pieces together
Thread your needle with tan embroidery floss.
Stack all three pieces with the two large sacks on the bottom and the sack pocket on the top.
The purpose of the two identical sack pieces is to provide structure for the bag. If you just used one layer things would be floppy, and we would not be able to add the rare earth magnet to make this accessory compatible with the magnetic Santa and the other magnetic felt dolls.
Beginning at the top of the sack, use a whip stitch to sew the pieces together all the way around the bag. At first it will just be the two layers, then it will be three layers around the pocket.
When you get close to finishing the entire circumference of the sack, leave a small gap before proceeding to the next step.
STEP THREE: Insert the magnet
Insert one rare earth magnet into the opening at the top of the bag.
Finish the remainder of the edge.
Be sure to check the polarity of your magnets and accessories before sewing the bag shut. If one doll has the magnet’s positive side forward, and another doll has the magnets negative side forward, your accessories won’t be as compatible. The accessories also need to have the magnets in the correct direction otherwise, they’ll stick to the front of one doll’s hand and the back of another. I use one doll as my “original” or “tester” and make everything else based off that one doll.
STEP FOUR: Secure the magnet
Once your magnet is the direction you want it to be facing, slide it to the top of the bag. If it isn’t the right direction initially, you have enough room inside the bag to flip it over. Then, use your needle and floss to sew several stitches across the neck of the bag. This will secure the magnet into the top portion of the sack and should keep it from flipping.
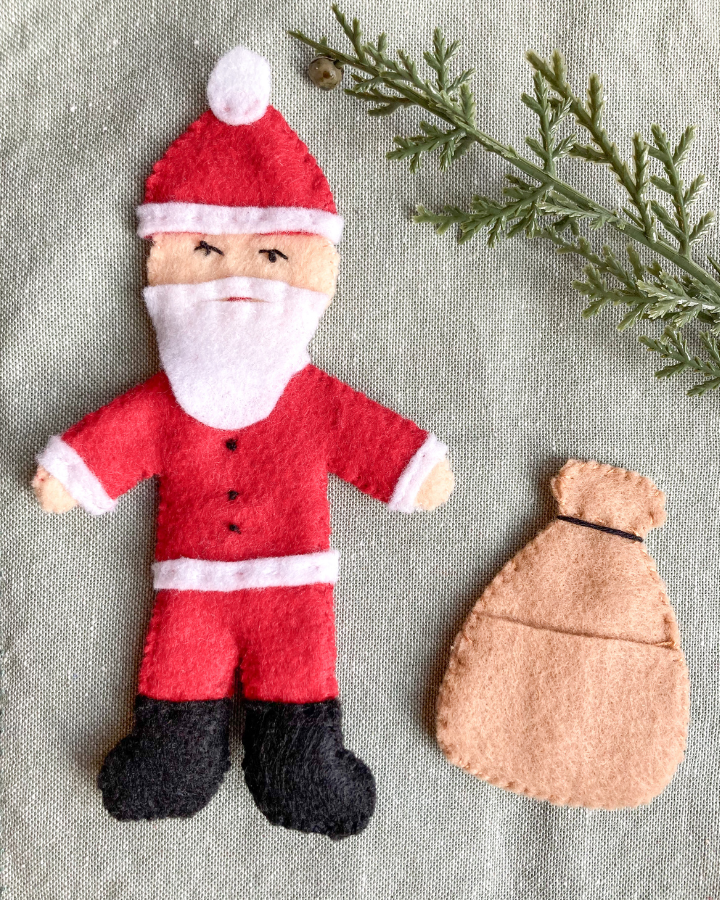
STEP FIVE: Add the drawstring
To make the sack appear to be cinched closed, and to cover the mechanics of securing the magnet, we will add a decorative drawstring.
Cut the desired length of black embroidery floss. Tie the floss around the neck of the sack and knot tightly.
Form a bow. Knotting again.
Finally, cut the ends to your desired length and knot those ends to keep the floss from unraveling. (See below)

The front of Santa’s Felt Sack will be solid with a tie like shown above. The sack will now be magnetic to be “carried” by Santa or other felt dolls.
The back of the felt doll Santa sack has a pocket for carrying little gifts (shown below).
That’s it! Let me know how it went in the comments.
FELT DOLL SANTA SACK PDF DOWNLOAD
Don’t forget to make the Santa!
Leave a Reply