
Felt pocket pals are on-the-go companions ready for wherever life takes you. Each felt pocket pal is made from soft fabric, which is quiet, for independent play during appointments, church, or in the car.
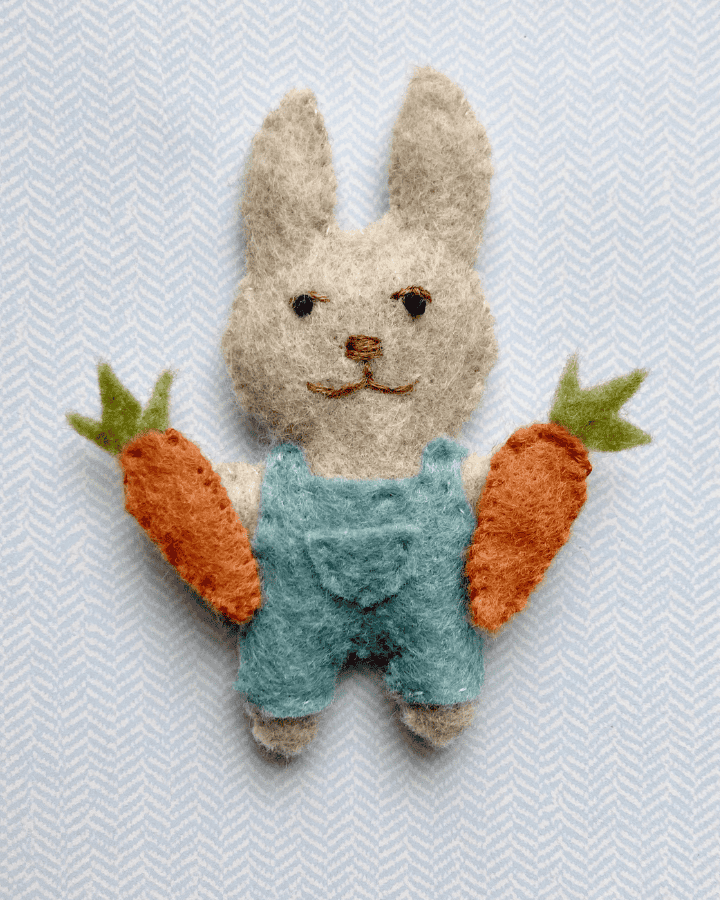
Farmer Rabbit boasts a collection of miniature magnetic accessories, which can easily slip in a backpack, duffle bag, purse, or of course, a pocket.
Felt Pocket Pals: Farmer Rabbit Pattern
Supplies:
- felt
- embroidery floss
- quilt batting or cotton balls
- needle
- four 2×6 mm rare earth magnets (optional)
- Felt Pocket Pal : Farmer Rabbit PDF Pattern (free download)
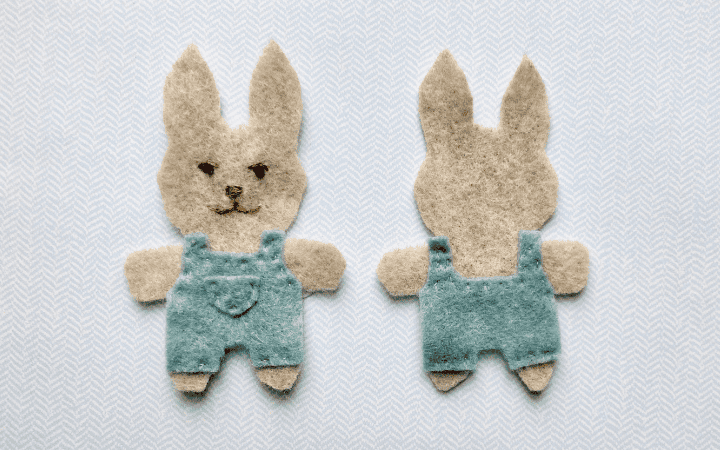
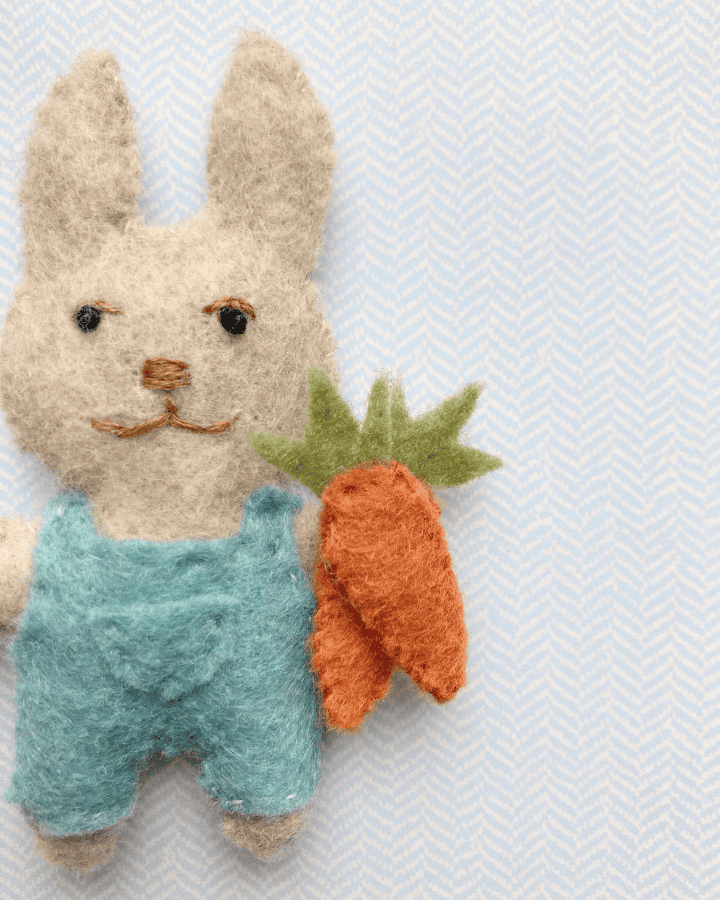
Farmer Rabbit’s Body and Clothes
First, print and cut out the Felt Pocket Pals Farmer Rabbit Pattern pieces.
Choose your fabric colors and cut out the coordinating felt pieces. Farmer Rabbit is five main pieces. Two identical body pieces and three coverall pieces (a front and a back…plus a pocket).
Begin by attaching the front and back coverall pieces to the body panels. The front coveralls will go onto one rabbit body, and the back coveralls will go onto the second rabbit body. Use a running stitch and a single strand of thread or floss to sew along the areas indicated by a dotted line on the pattern. This means some of the edges will not get sewn down in this step.
After you have attached the coveralls, position the pocket in the center of the front coverall and attach using a running stitch along three sides. Be sure to leave the top side open for a functioning pocket!
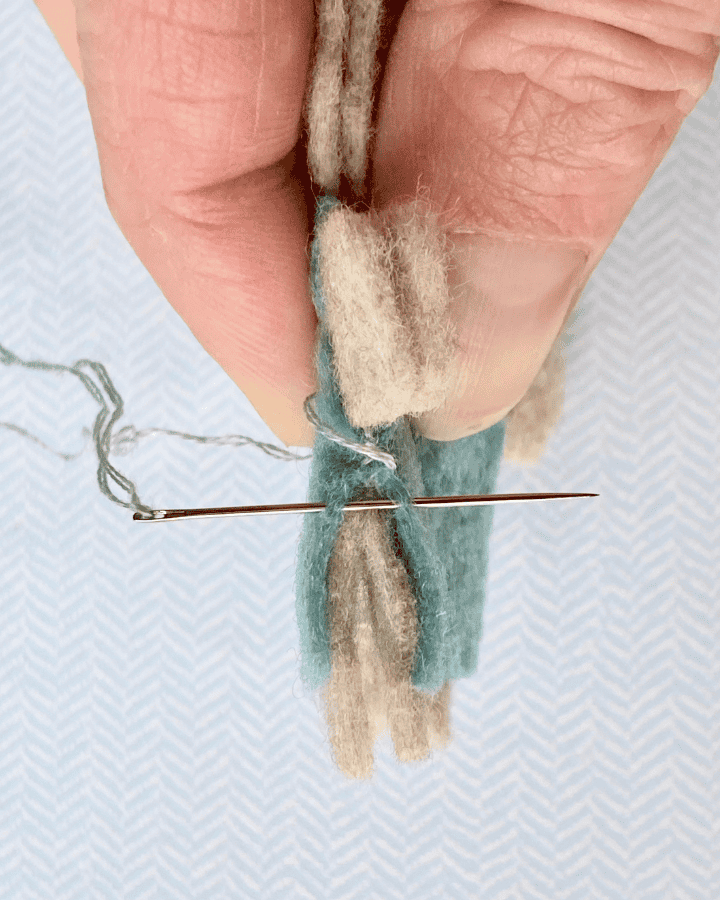
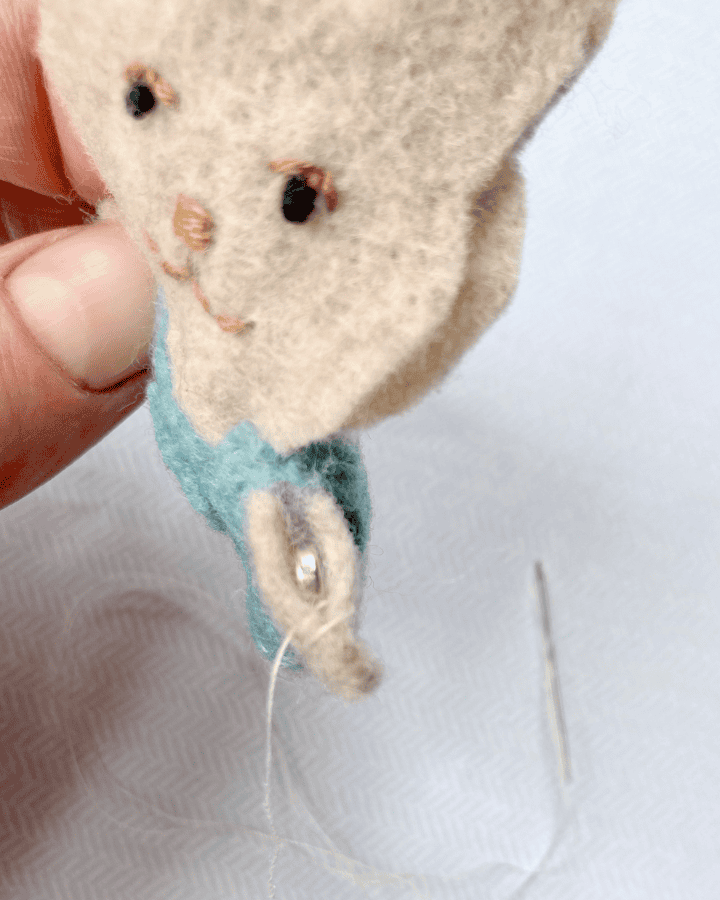
Now it’s time to close off the open (cut) edges of the coveralls. Using a whip stitch, begin on one “armpit” near the top of a pant leg, and work your way down the raw edges. Insert your needle up through the bottom blue layer of felt, and then up through the top layer of felt, and repeat. DO NOT catch the body layers of felt sandwiched in the middle with your needle. (SHOWN ABOVE) If you do it properly, and pull your whip stitch tight, you should hide all the body felt and be left with a complete wrap of blue around the legs. (SHOWN BELOW)
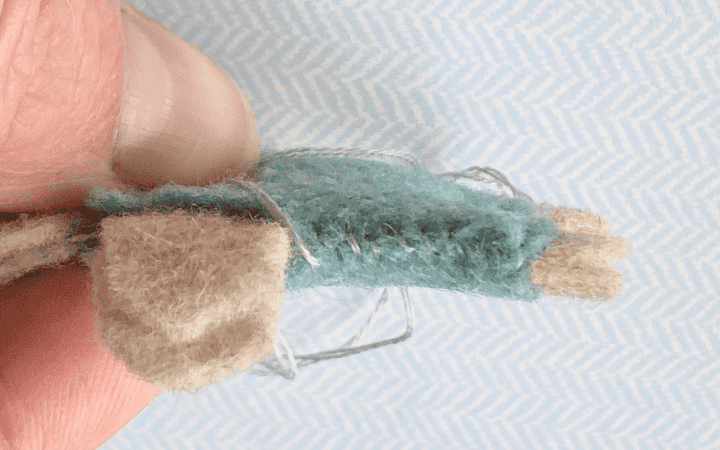
Make your way along the open edges of the legs. You shouldn’t need to tie off until the very end if you hide your floss inside as you jump from seam to seam.
Farmer Rabbit’s Face
Next, use three strands of brown or tan floss to add the facial features where indicated on the pattern. You can choose to add the face before or after completing the coveralls.
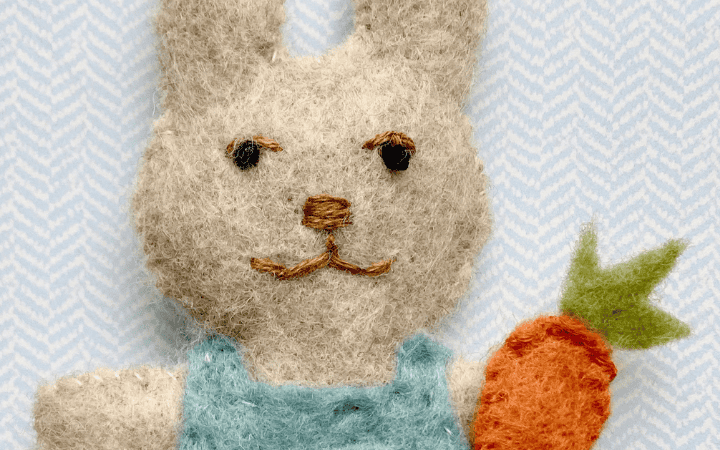
The Nose
The nose is a series of long stitches stacked on top of each other close together
The Mouth
Use 5 stitches to created the mouth. One going directly down from the nose, and two off each side in a slight “v” shape to make a shallow “w” when the entire mouth is complete.
The eyes
I like to make my eyes a little more detailed by making an upper “eyelid”. If you prefer to do the simplest version jump down to the next paragraph. To make the “eyelid” use two stitches to make a small shallow inverted “v” just above where you want both eyes to go. You can see another example of the eyes on my Felt Doll Pattern & Tutorial.
Use several strands of black thread to make a french knot for each of the eyes.
Stuffing and Closing Up
First, use a double strand of body colored floss and a whip stitch to close both feet at the bottom of the rabbit.
Secondly, start at an “armpit” and begin using a whip stitch to close up the sides. Add a little stuffing in the legs and body as able, and keep adding as your work your way around. Just a little puff will do, this isn’t a stuffed animal, but some fluff gives it dimension.
Try using the tips of a small pair or scissors or a dull pencil to tuck the bits of batting into the small spaces.
Adding the Arm Magnets
If you want to add magnets to the hands (optional), stop when you have one side of the arm still open. Make sure the body is sufficiently stuffed to prevent the magnet from sliding out of the arm. If you are inserting a magnet DO NOT add any batting to the arms. It will just be the two layers of felt and the magnet in each arm.
If you are not adding magnets, you may choose to add a little batting instead. Do so as you sew up each arm of the rabbit.
Sew around the face, over the ears, and back down the other side. Be sure to have the stuffing how you like it as you go along. I suggest tucking little bits into each ear as you finish them and then do the head, before finishing the final arm section.
Add a magnet to the other hand (optional). This time it would make sense to leave the bottom side of the arm open (opposite of what is shown in the image above)
Make sure the stuffing is how you like it before you finish the last arm and close the rabbit up.
Tie off and tuck any loosed ends.
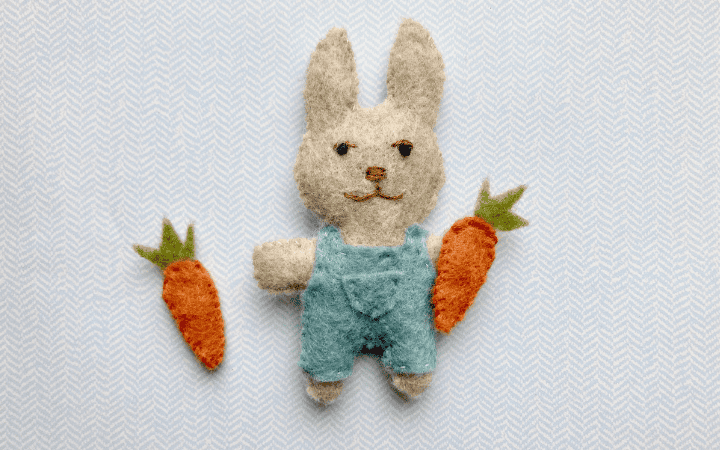
Constructing the Magnetic Felt Carrots
Now that you have made Farmer Rabbit, why not sew him a couple little carrots to enjoy?
Begin but cutting out the carrot pattern pieces from the Felt Pocket Pals Farmer Rabbit Pattern PDF. You can choose to make as many carrots as you would like by cutting out one pair of orange carrots (two pieces of felt) and a green carrot top.
For the carrot top you may find it just as easy to “wing it” and make your own greens rather than trying to cut around the tiny piece.
Sew the Carrot
Insert a needle with a double strand of orange floss as the top of the carrot just to the side of where you want your green top to be. (We’ll add the greens last.)
Begin sewing, with a whip stitch, down to the tip of the carrot and back up again. Once you get close to the top, leave a sufficient opening to fit the base of the greens.
Insert the rare earth magnet (optional) then tuck the base of the greens into the opening. Make sure the green felt does deep enough that you will catch it as you make your final stitches to finish off the carrot.
Using a running stitch. Continue sewing the remainder of the carrot closed. Be sure to catch both layers of orange and a layer of green with each stitch. Once you have make it back to where you started, tie off and hide your ends.
Repeat as many times as desired. For my rabbit I made two, and if you will notice the carrots themselves will stick to each other, allowing Farmer Rabbit to carry several per hand.
Felt Pocket Pals : Farmer Rabbit
Download the PDF Pattern HERE
Leave a Reply