If you’re wondering how to make butter from heavy cream, you’ve come to the right place. It’s super easy, especially if you use a stand mixer.
Place 1 quart of heavy cream into the bowl on your stand mixer. Fit the mixer with the whisk attachment, and set to medium speed, increasing the speed as the mixture thickens to avoid splashing. After 8-10 minutes drain the buttermilk from the butter that has formed. Rinse well, wrap, and store in the fridge or freezer.
My First Time Making Butter from Heavy Cream
The first time I remember making butter “from scratch” was back in kindergarten. My kindergarten teacher must have been a good one, because I have so many memories of the different projects we did. However, on this particular day, as a class we went outside and sat in the grass at the front of the school. We then took turns shaking a small jar of heavy cream, and passing it around the circle, until a little ball of butter formed inside.
Fast forward 20 years, and my second memory of making butter from heavy cream was during a small family gathering at my sister-in-law’s house. My in-law’s dairy cow had calved, and they were now milking her. So my sister-in-law had collected some cream and filled several mason jars, which we passed around and took turns shaking during the little get together. This time I remember participating in the additional steps of rinsing and salting the butter, and we got to take a small container home.
While it is certainly a simple process to turn heavy cream into butter by shaking it, there are much more efficient way to get the job done than putting it in a jar and shaking it by hand. Thankfully, inventors throughout the ages have found many methods to mechanically produce butter.
Using a Butter Churn
I have never actually used a butter church, but they have always fascinated me. I have memories of the butter church sitting atop my grandparents vintage stove during my childhood. It was a large glass jar with a handle on top that spun a beater inside when cranked. Most probably have a mental picture of a pioneer woman plunging a wooden paddle up and down into a tall slender crock in a log cabin somewhere in their brain. But, did you know you can also rock cream back and forth in a wooden box, or use a kitchen whisk? The ways to make butter are really limitless as long as you are moving and shaking the cream to allow the process that encourages the necessary changes to occur. (More on that later.)
Using Electric Appliances
Thanks to electricity, the power to make this conversation from cream to butter no longer needs to require substantial arm muscles. The machines we need to complete the job are present in nearly every kitchen in the developed world. While I could make butter using my blender, beaters, food processor, or a host of other gadgets, I prefer to use my trusty Kitchen Aid stand mixer.
The Science Behind Making Butter
Before we dive into how to make butter from heavy cream in your stand mixer, let’s talk a little bit about the science behind what is happening during this process. (I’m a science person, did you expect I could get through this post without a mini science lesson? )
Let’s talk fat
Heavy cream, cream, whipping cream, etc are terms for the fat found in milk (typically bovine AKA cows). Since raw milk is not naturally homogenized, the fat will separate out of the milk and form a thick layer on the top of the milk. For the rest of this post it may be helpful to bear in mind that water and oil don’t mix. Fat and water are the same way. I covered this concept in more detail in my post on How to Clean a Cast Iron Skillet with Salt.
Homogenization is a process used by milk producers to create a uniform texture throughout the milk. Essentially, the fat globules are broken down into such small particles that they do not separate out and float to the top, but remain suspended in the liquid.
Since the fat globules in unprocessed milk are large enough to float to the top, they can easily be skimmed off and used for the purpose of making butter. You see, making butter is in many ways the opposite of homogenization. Instead of trying to break the fat into smaller pieces, we actually want to encourage those fat globules to stick together and make larger clumps. Using a high concentration of fat found in the cream gives us the proper conditions to do that.
Shake it up baby now
When shaking the cream, you are giving opportunity for the fat globules to be bumped out of their suspension in the water, and attach to other fat in the cream. This is what they want to do naturally since, like I already stated, water and fat don’t like to mix. As the agitation continues the fat globs form into clumps, then small balls, and the pieces of fat continue to separate out of the water and bind together into larger and larger pieces. Finish by straining off of the milky water (buttermilk) and coaxing the clumps into one congruent ball, and we have butter my friend.
Butter Making Data Collection
Common Questions
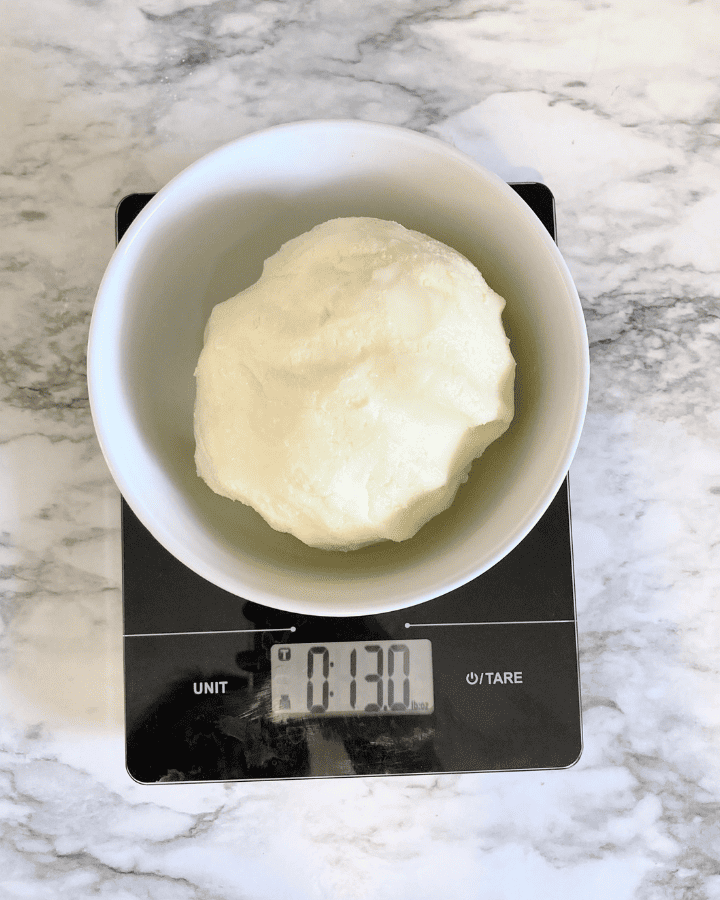
To be sure I could offer you the very best information about making butter from heavy cream in my mixer, I bought 12 pints of cream and ran multiple back to back trials. During each batch I began by recording the weight of 1 quart of cream with my digital scale. I consistently got 2 pounds 0 ounces for my initial cream weight, with only a few tenths of an ounce in variation. Each batch of butter came out around 13 ounces, with a range of 13.0 to 13.8 ounces. I also collected roughly two cups of buttermilk per batch.
Cost Calculator
Wondering what that comes out to for a cost per pound?
the cost per quart of cream/ounces of butter made = cost per ounce
calculated cost per ounce x 16 = per pound price
For my trials I was able to swipe up quick sale cream for $1.58 per quart. My average yield in ounces of butter was 13 ounces, which made my per ounce price 12.15 cents, and my final cost per pound $1.94.
$1.58/13 = $0.1215 per ounce
12.15 x 16 = $1.94 per pound
How to Make Butter from Heavy Cream
(Using a Stand Mixer)
Ingredients:
- heavy cream, whipping cream, fresh cream
- salt (optional)
Supplies:
- Stand mixer with whisk attachment (This is the one I have)
- Spatula
- Sieve or Strainer
- Wooden Spoon (optional)
- Mixing Bowl
- Plastic Wrap
Directions:
Place cream in the bowl of your stand mixer. (I use an entire one quart carton. This seems to be the most volume my mixer can handle.)
Fit your mixer with the whisk attachment. I choose to use a whisk rather than a paddle because I found using the paddle makes a lot more splashing. I would still suggest using the splash guard on your mixer (if you still have it or can find it).
Turn your mixer onto medium-high speed (KitchenAid – 6). Allow the cream to whip. As it goes through the process of becoming butter you will go through several stages and textures. Let me walk you through an approximate timeline.
Two Minutes
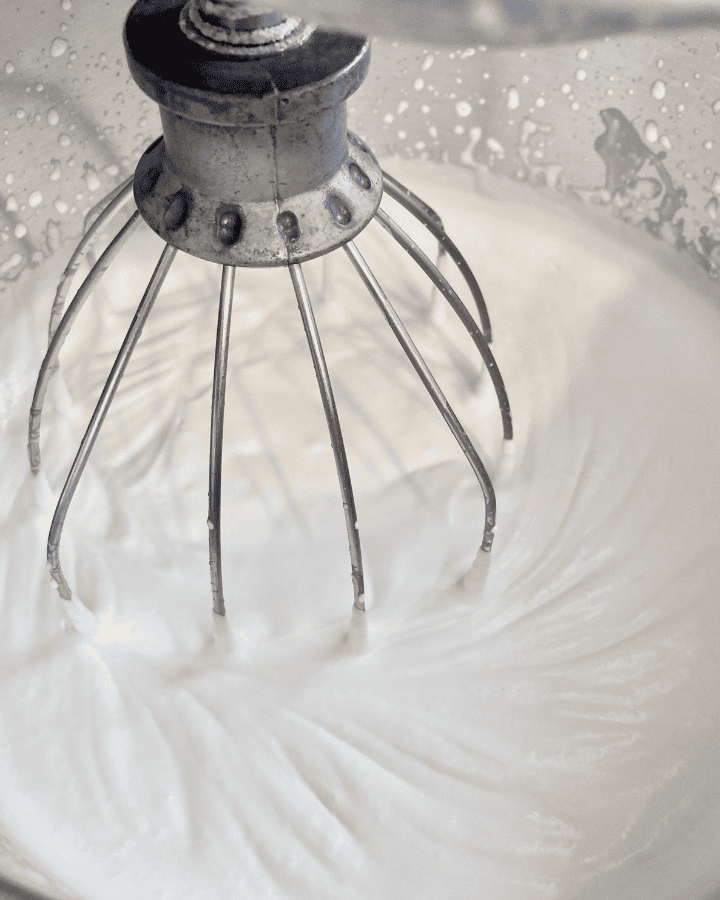
After a couple minutes you will have a thicker cream that quickly turns to whipped cream. As soon as the cream has thickened enough that it won’t splash out of the bowl, I up the speed to as high as my mixer will go for the remainder of the process (KitchenAid – 10). Please note that you may need to use a spatula at some point to wipe down the sides of your bowl.
Four Minutes

Six Minutes
Eight Minutes
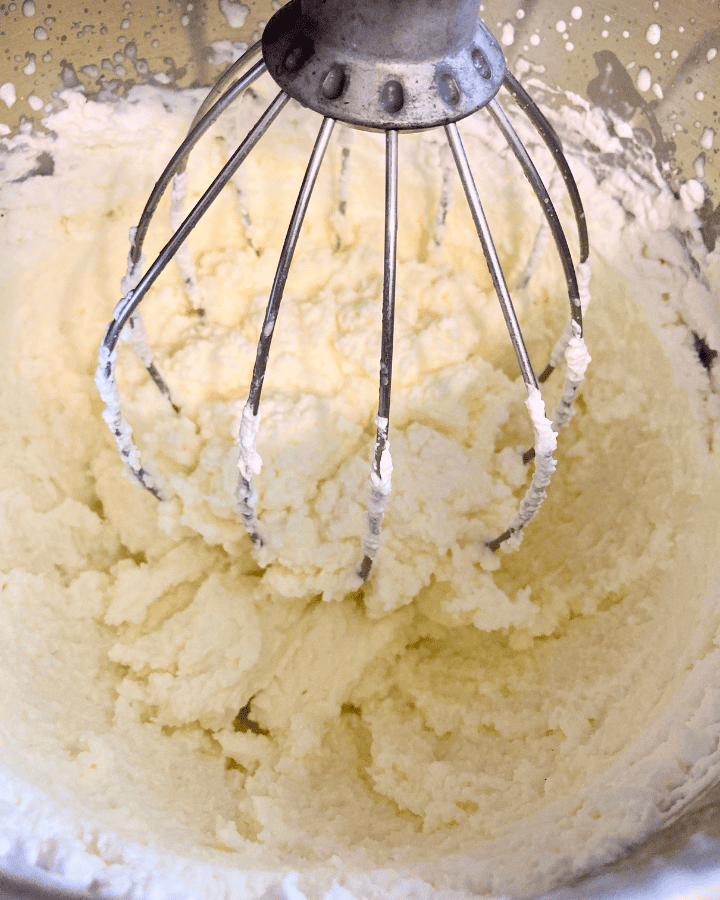
Eventually, quite suddenly, the butter will separate out from the buttermilk. You’ll know this has happened because your mixer will start splashing again. You should be able to even hear the difference as the liquid sloshes in the bowl.
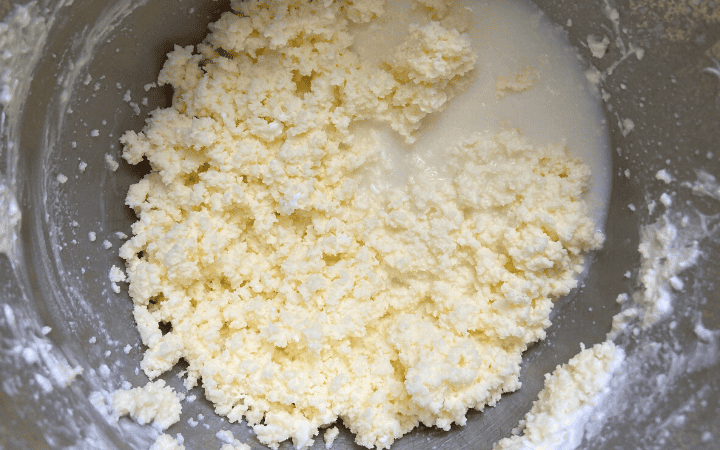
At this point I slow the mixer down to its lowest speed and allow the butter to clump up in the whisk.
Ten Minutes
You’ve made butter, and now it’s ready for the next step.

Strain & Rinse
Use a sieve to drain off the buttermilk. Be sure to collect and keep this liquid for use in other recipes! Try substituting buttermilk for whey in my Whey Pancake recipe!
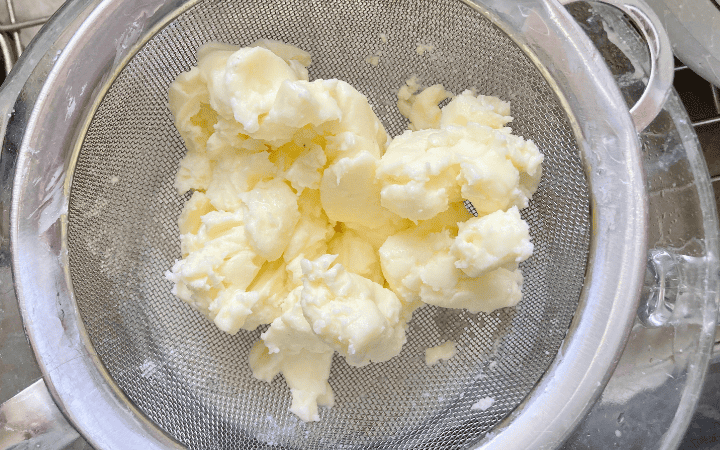
Now it’s time to rinse any excess buttermilk from your butter. Remaining buttermilk in the butter will cause it to spoil more quickly. We want just the fatty butter, not the watery buttermilk.
Rinse the butter under cold running water, or place into a bowl with several cups of cold water. Using a wooden spoon, or your hands, work to press the excess liquid from the butter. Just be aware that warm hands may cause the butter to be more soft and sticky. The butter will firm up as it cools.
If the butter has not already clumped into one ball, you can form it as you work.
As the water gets cloudy, dump it and get fresh. Continue working by folding and pressing the butter until the water runs clear to remove as much of the buttermilk as possible.
Store
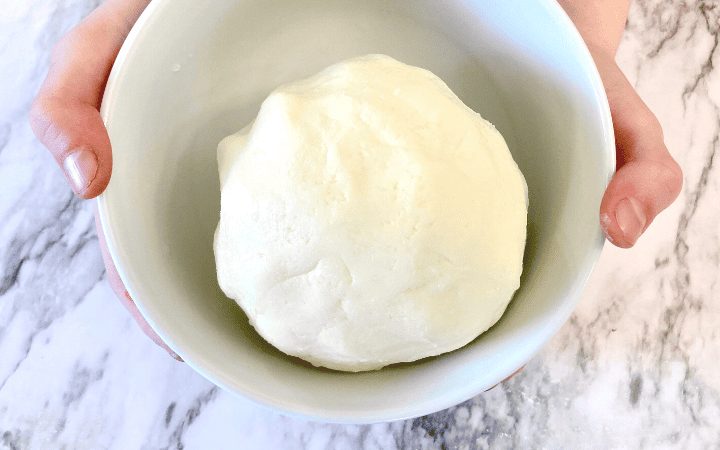
The final step is preparing the butter for storage. At this point you can work salt into you butter if you would like. Salt does act as a preserving agent. Store bought butter contains about 1 tsp. of salt per pound. Consider adding a similar amount for a similar taste, or adjust to your liking.
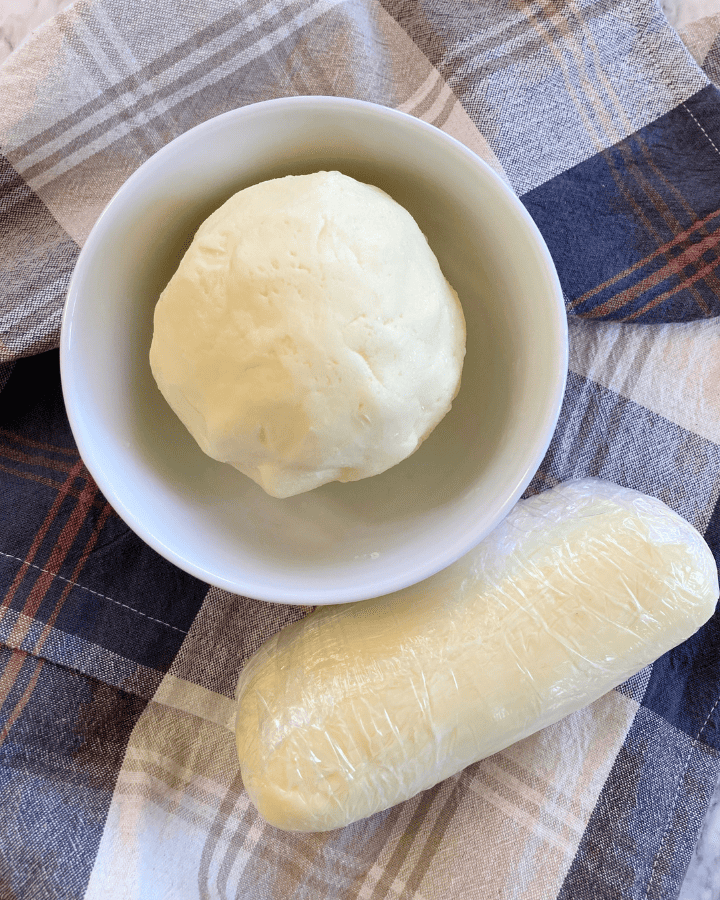
Form the butter into a ball or log, and wrap tightly with plastic wrap. You can also transfer into an air tight container for fridge storage, or form your butter into molds if you have them.
Store in the fridge for several days, or freeze for long term storage.
That’s it! You did it!
Butter Storage Ideas
Air Tight Butter Keeper with Wooden Lid
Don’t forget to put all that good buttermilk in the fridge to use later.

Common Questions
How much butter will I get?
One quart of heavy whipping cream will yield about 1 pound of finished butter (13 ounces in my trials), plus a couple cups of buttermilk.
How much salt should I add?
Store bought butter contains about 1 tsp. of salt per pound. Consider adding a similar amount for a similar taste, or adjust to your liking.
Try these other homemade recipes…

How to Make Butter From Heavy Cream
Easily make butter from heavy cream using a stand mixer in only ten minutes! Step by step instructions with photos on the blog!
Ingredients
- 1 quart heavy cream
- salt (optional)
Instructions
- Place 1 quart of cream in the bowl of your stand mixer.
- Fit your mixer with the whisk attachment. I would still suggest using the splash guard on your mixer.
- Turn your mixer onto medium-high speed (KitchenAid - 6). Allow the cream to whip.
- After a couple minutes you will have a thicker cream that quickly turns to whipped cream. As soon as the cream has thickened enough that it won't splash out of the bowl, I up the speed to as high as my mixer will go for the remainder of the process (KitchenAid - 10). Please note that you may need to use a spatula at some point to wipe down the sides of your bowl at some point.
- Eventually, quite suddenly, the butter will separate out from the buttermilk. You'll know this has happened because your mixer will start splashing again. You should be able to even hear the difference as the liquid sloshes in the bowl.
- At this point I slow the mixer down to its lowest speed and allow the butter to clump up in the whisk.
- You've made butter, and now it's ready for the next step.
Strain & Rince
- Use a sieve to drain off the buttermilk.
- Rinse the butter under cold running water, or place into a bowl with several cups of cold water. Using a wooden spoon, or your hands, work to press the excess liquid from the butter. The butter will firm up as it cools.
- If the butter has not already clumped into one ball, you can form it as you work.
- As the water gets cloudy, dump it and get fresh. Continue working by folding and pressing the butter until the water runs clear to remove as much of the buttermilk as possible.
Store
- The final step is preparing the butter for storage. At this point you can work salt into you butter if you would like. Salt does act as a preserving agent. Store bought butter contains about 1 tsp. of salt per pound. Consider adding a similar amount for a similar taste, or adjust to your liking.
- Form the butter into a ball or log, and wrap tightly with plastic wrap. You can also transfer into an air tight container for fridge storage.
- Store in the fridge for several days, or freeze for long term storage.
Don’t forget to pin it for next time!

Post Update: November 18, 2024


I followed this and my butter came out perfectly! Thank you.
So glad you found success. Happy butter making!
I made this on Saturday. Incredible!!
Glad to hear 🙂